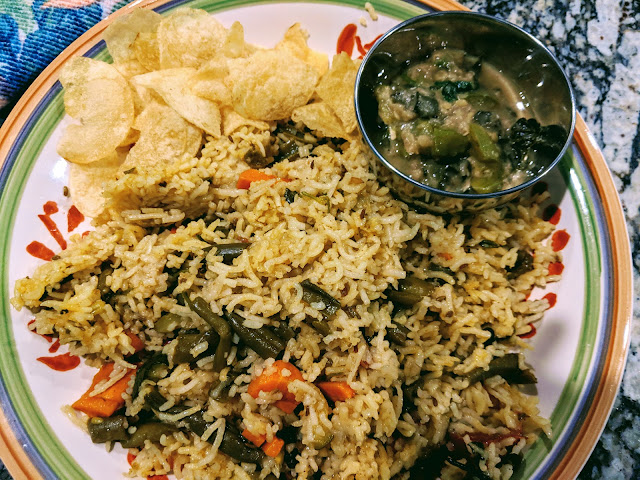
Beans and Carrot Rice with Capsicum-Kale Masoor Dal
 |
| BEANS AND CARROT RICE WITH BELL PEPPER -KALE MASOOR DAL |
This is a very easy to make one pot meal. I made this rice using just 2 veggies-beans and carrots.
This is a no onion-garlic recipe. Go ahead and add these, if you prefer, for a more robust flavor.
This rice gets its flavor from freshly ground whole spices, slightly sauteeed in ghee and ground to a fine powder.
I paired this variety rice with some healthy Masoor dal. It packs in quite a protein punch, and does indeed make for a satisfying and filling dinner.
Off to the recipe
Beans and Carrot Rice:Ingredients:Basmati rice- 2 cups (cooked)
Beans- 1 cup (roughly chopped into bite sized pieces)
Carrots- 1 cup (cubed)
Turmeric powder- a pinch
Chilli powder-2 tsps (adapt it to your spice preference)
Salt- to taste
Ghee- 2 tbsps
Ingredients for the whole spices masala powder:Cloves- 3 to 4
Cardamom pods- 4
Cinnamon powder- 1 tsp, or a small cinnamon stick
Coriander seeds- 2 tsps
Star Anise- 1
Preparation of the whole spices masala powder:Heat 1 tsp of ghee in a kadai. Over a medium flame, roast the spices, until slightly browned. Once it cools, grind to a fine powder, and keep ready for use
Ingredients for seasoning:Black cumin seeds/Cumin seeds- 1 tsp
Fennel seeds- 1 tsp
Preparation:Pressure cook the basmati rice. Once the pressure subsides, open the cooker, and carefully spread out the rice in a wide plate, and fluff it with a fork gently, so as to keep the grains separate.
In a kadai, heat 2 tsps of ghee. When hot, add the spices for seasoniong, and saute for a couple of seconds. Tip in the chopped beans and carrot pieces. Add the salt, turmeric powder and chilli powder.
Add 1/2 cup water, and cook covered over a medium flame , until the veggies are cooked. They must be cooked tender, but not mushy. Add the prepared masala powder, and stir well, so the flavors get incorporated. Switch off the flame.
Once the rice and the vegetable mix has considerably cooled down, mix them together. Mixing when they are hot, will end up in the rice taking on a very pasty texture.
Transfer to a plate and enjoy!!!
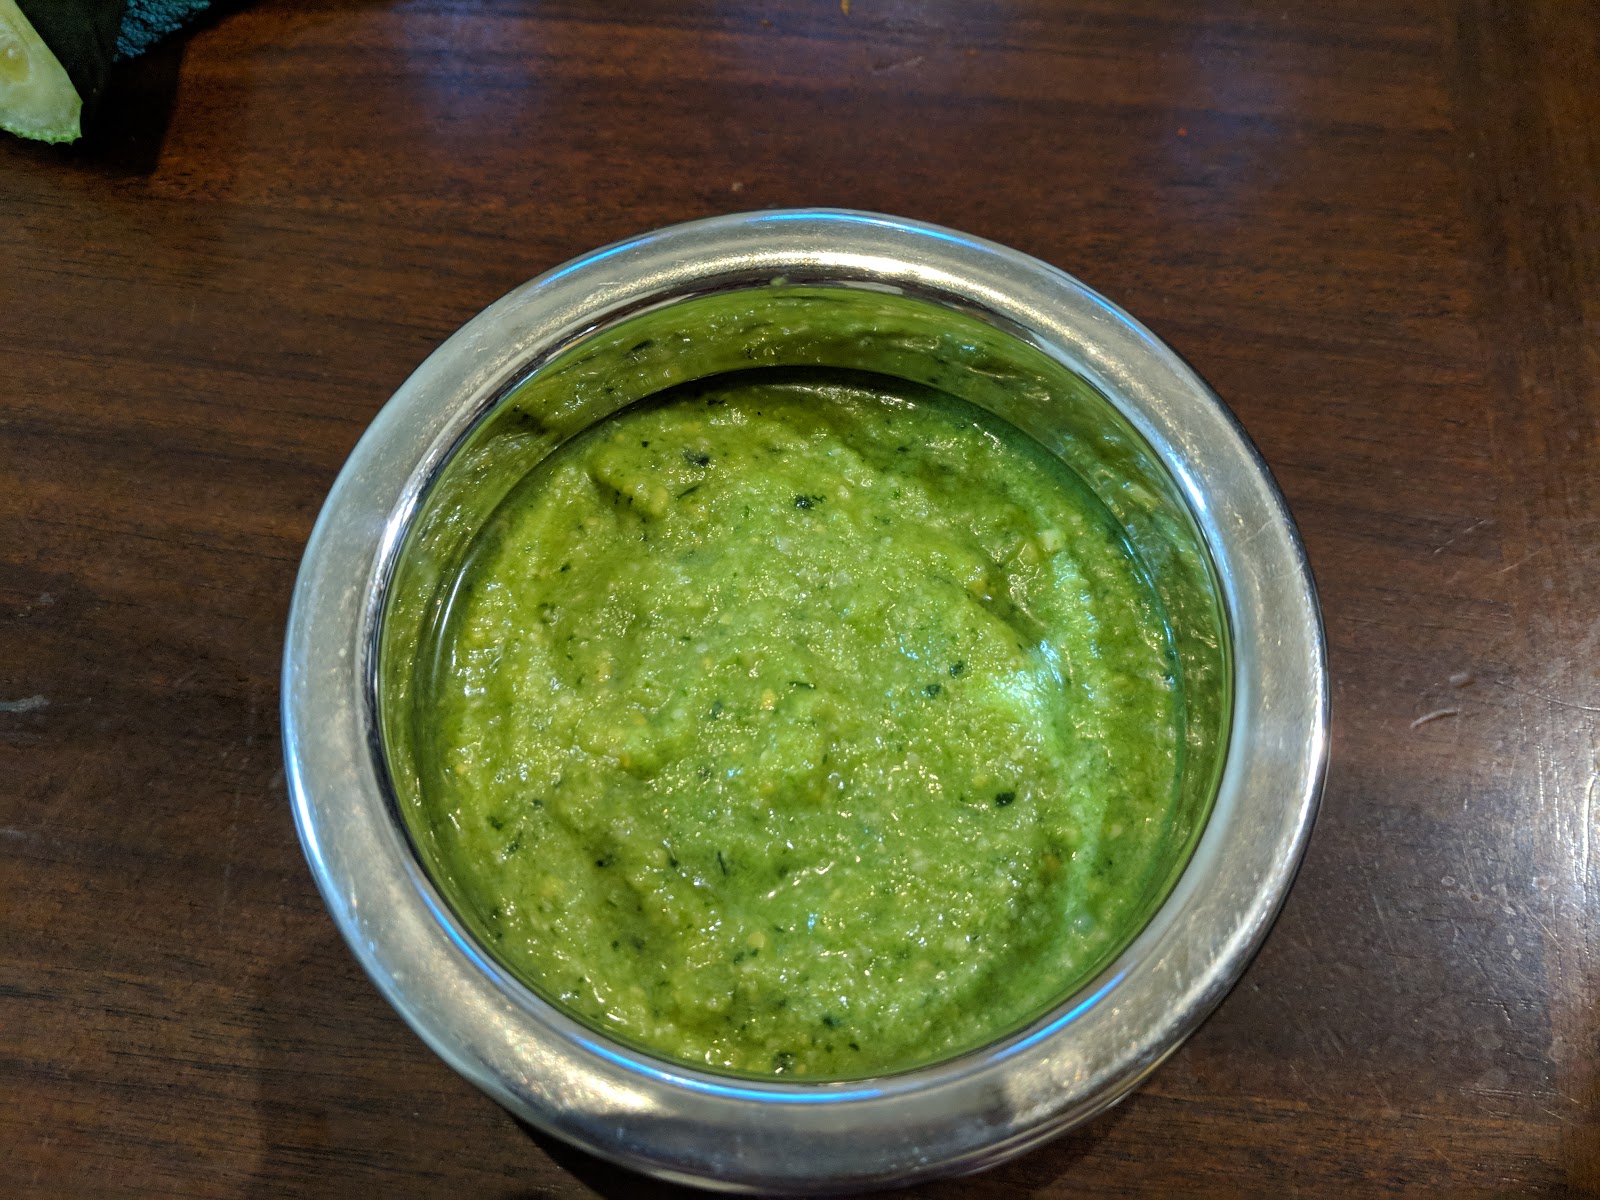
Bell Pepper-Kale Masoor Dal |
| Bell Pepper-Kale Masoor Dal |
Masoor Dal , also known as Red lentils, is a very nutrient rich legume variety. It is high in iron and protein. When you pair it with healthy greens like Kale, you sure have a winner! This Dal brings with it the added crunchiness of green bell peppers.
This Dal makes for a good side with rice and roti, paratha recipes as well.
Ingredients:Masoor Dal- 1 cup (thoroughly washed and soaked)
Bell pepper- 1/2 cup (chopped into bite sized chunks)
Kale- 1/2 cup (roughly chopped)
Turmeric powder- a pinch
Green chillies-1 (add more, if you want the dal spicier)
Garam Masala- 1 tsp
Salt- to taste
Oil- 2 tsps
Notes:1. Soak the Masoor dal for atleast 4 -5 hours prior to cooking. This lentil variety cooks pretty easily, and does not require an elaborate soaking ritual. Nevertheless, I soak the lentils for a longer period, because well soaked lentils make nutrients more bio available, and also helps in reducing the oxalate levels in some legumes.
2. I used Lacinato Kale for this Dal. Any leafy green, or a combination of greens, would work equally well.
3. Masoor dal, in isolation, or a combination of Dals like Toor, Moong would be delicious too.
Spices for seasoning:Cumin seeds- 1 tsp
Preparation:Pressure cook the masoor dal with the chopped Kale leaves, adding sufficient water. Once the pressure releases, mash the cooked dal-Kale medley, with the back of a ladle, for a more creamier texture.
In a kadai, heat oil. Add the cumin seeds, and once, it splutters, add the chopped green chillies. Saute briefly, and add in the chopped bell pepper. Add salt, turmeric powder and garam masala. Cook covered over a medium flame, until the pepper chunks become soft.
Add the cooked Dal-Kale to the kadai. Stir well to bring everything together, making sure there is enough water.
Healthy flavorful Masoor Dal gravy is ready to be enjoyed with rice or rotis, of your choice.